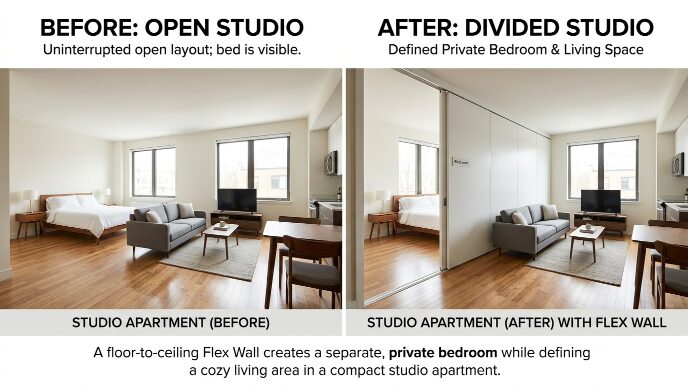
Splitting a 1-Bedroom in Brooklyn or Manhattan: A Roommate’s Guide
Splitting a one-bedroom with a temporary wall in NYC typically costs $900–$1,800 installed, depending on the borough, wall length, and whether you add a door. That’s a one-time cost split between two roommates — not a monthly fee. In Park Slope, a 1-bedroom running $3,200 a month works out to $1,600 each once you split it. Compare that to a true 2-bedroom in the same neighborhood, often $4,800 or more, and the math isn’t close.
This guide covers what it actually costs to split a 1BR in Brooklyn or Manhattan, whether your landlord can say no, and what a “wall share” listing means if you’re the one searching for a room. The same install cost and landlord-approval process apply whether you’re in Queens, the Bronx, or Staten Island — only the going rent changes by borough.
How Much Does It Cost to Split a 1-Bedroom with a Temporary Wall?
A pressurized wall to split a 1BR runs $900–$1,800 in most cases. Manhattan installs tend toward the higher end, $1,200–$1,800, because ceiling heights and wall lengths in pre-war buildings vary more. Outer-borough installs — Brooklyn, Queens — typically land at $900–$1,400.
The final number depends on three things: how long the wall needs to be, whether you want a door versus an open doorway, and any add-ons like soundproofing. A basic pressurized wall with a standard door covers most roommate splits without pushing into premium territory.
Splitting a Park Slope 1-Bedroom: The Actual Math
Here’s a real example. A 1-bedroom in Park Slope renting at $3,200 a month splits to $1,600 each between two roommates. A comparable true 2-bedroom in the same area often runs $4,800 or more — meaning each roommate would pay closer to $2,400.
Split a 1BR with a temporary wall instead, and two roommates can save roughly $800 each per month versus renting a 2BR outright. Add the one-time wall cost, and the split still pays for itself within the first two months.
Want an exact number for your apartment? Tell us your space and we’ll tell you exactly what it costs — free quote within the hour.
Get Your Free QuoteDo I Need My Landlord’s Permission to Split a 1-Bedroom?
Yes — in most NYC buildings, you need written landlord approval before installing a pressurized wall to split a room. This applies whether you’re in a Crown Heights brownstone or a Greenpoint rental building.
Worried they’ll say no? Most landlords approve pressurized wall installs because they cause zero structural damage — no nails, no screws, nothing that changes the apartment’s Certificate of Occupancy, as defined by the NYC Department of Buildings. Bring that up specifically when you ask. It’s usually the deciding factor.
Is a “Wall Share” Legal in NYC?
A wall share — splitting a legal bedroom or living room into two sleeping spaces with a temporary wall — is generally permitted with landlord approval, as long as the installation doesn’t alter the building’s structure or violate fire egress rules. This isn’t a loophole; it’s the same reason pressurized and flex walls exist as a product category in NYC in the first place.
That said, every building is different, and co-op and condo boards can add their own layers of approval on top of the landlord’s. If you’re in a co-op in Crown Heights or the Upper West Side, check with the board before signing anything — don’t assume the landlord’s yes is the only yes you need.
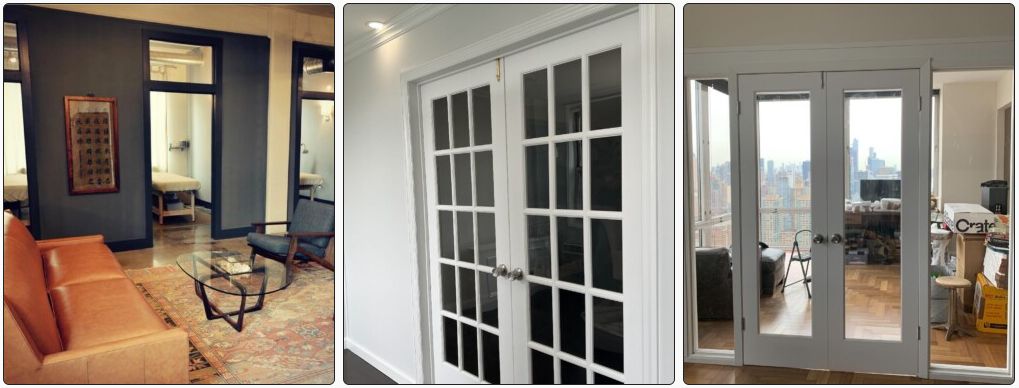
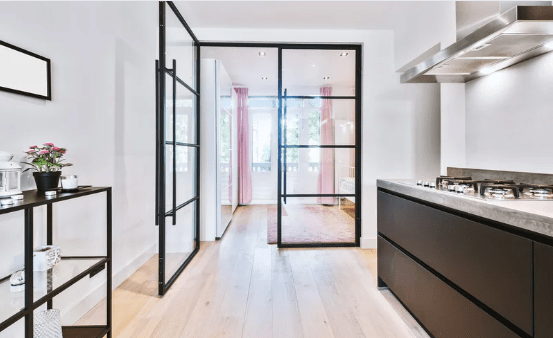
Flex Wall vs. Pressurized Wall for a Roommate Split — Which One?
For most roommate splits, a pressurized wall is the better fit. It reaches floor to ceiling, includes a door, and blocks sound better than an open-frame flex wall — which matters when you’re sharing a 1-bedroom with someone who isn’t your partner or best friend.
A flex wall for Brooklyn roommates who want a lower-cost option, or who are splitting a larger living room rather than a bedroom, can still work. It’s faster to install and typically costs less, but offers less privacy and less sound control. If privacy is the priority — and with a roommate split, it usually is — spend the extra money on a full pressurized wall.
What Happens to the Wall When One Roommate Moves Out?
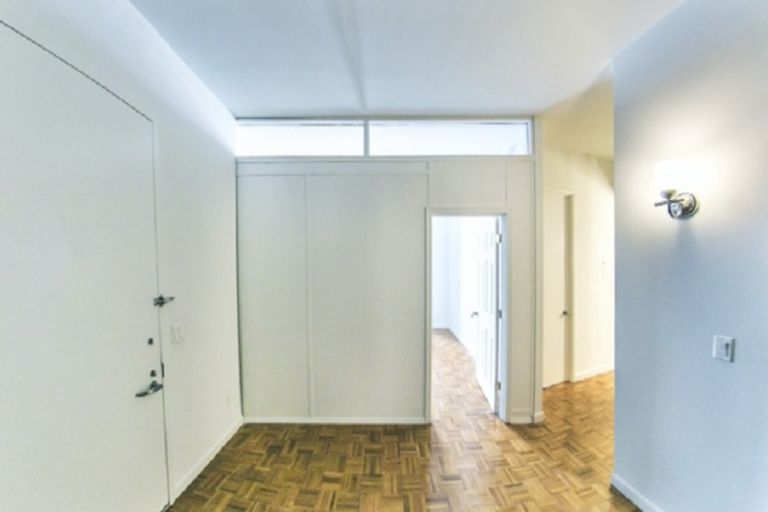
The wall comes down as cleanly as it went up. Pressurized walls are removable without damage, so when a lease ends or a roommate situation changes, the space goes back to its original layout. This matters for security deposits — a properly installed pressurized wall shouldn’t put yours at risk.
If you’re the one moving into a “wall share” listing you found online, ask the current tenant whether the wall was professionally installed or DIY. A professional pressurized wall install removes cleanly. A DIY job with actual screws and drywall does not, and that’s a deposit problem waiting to happen for whoever’s on the lease.
What to Look for in a “Wall Share” Listing
If you’re searching for a room rather than creating one, you’ve probably seen “wall share” in a listing title on StreetEasy or a roommate site. It means the apartment is a true 1-bedroom or studio that’s been split with a temporary wall, not a legal 2-bedroom.
That’s not automatically a red flag — a well-installed pressurized wall gives you a real door and real privacy. But a few questions are worth asking before you sign: Was the wall professionally installed, or did a previous tenant build it themselves? Does it reach the ceiling, or is it a partial partition? Is there a window or the required air and light access in your room, since that affects whether the space is legally livable as a bedroom at all.
A rushed or DIY wall share can mean thin walls, no real door, and a landlord who never approved the setup in the first place. A professionally installed one should feel like a real second bedroom, not an afterthought.
How Long Does It Take to Split a 1-Bedroom?
Most pressurized wall installs for a roommate split are done in a single day, often within a few hours. There’s no wet construction, no drying time, and no need to vacate the apartment during the install.
That means you can go from “we need to split this room” to “the wall is up” faster than most people expect — usually within days of getting a quote, not weeks.
FAQ — Splitting a 1-Bedroom with a Roommate
Can I legally split a 1-bedroom apartment with a roommate in NYC?
Yes, as long as the resulting spaces still meet basic livability standards and your landlord approves the installation. A pressurized wall doesn’t require altering the apartment’s Certificate of Occupancy, which is why most landlords approve it. Co-op and condo boards may require separate sign-off, so confirm both before scheduling an install.
How much does it cost to split a one-bedroom apartment with a temporary wall?
Splitting a 1BR with a pressurized wall typically costs $900–$1,800 installed, as a one-time cost — not monthly. Manhattan installs run closer to $1,200–$1,800; Brooklyn and other outer-borough installs are usually $900–$1,400. Get a free quote and you’ll have an exact number within the hour.
How much do roommates actually save by splitting a 1-bedroom instead of renting a 2-bedroom?
In Park Slope, a $3,200/month 1BR split two ways runs $1,600 each, versus roughly $2,400 each on a $4,800/month 2BR — a savings of about $800 per roommate, per month. The one-time wall installation cost is typically recovered within the first two months of savings.
What’s the difference between a flex wall and a pressurized wall for a roommate split?
A pressurized wall reaches floor to ceiling, includes a door, and blocks sound better — the better choice when privacy matters, which it usually does with a roommate. A flex wall costs less and installs faster but offers less privacy, making it a better fit for splitting a living room than a bedroom.